



INDICATOR · BEGINNER GUIDE
ORDER BLOCKS
Boxes the demand and supply zones left behind by strong moves, grades them, and marks BUY / SELL reactions when price returns.
◆Zones graded A+ to C◆Adds 15m and 1h zones◆BUY / SELL reactions marked◆Closed candles only
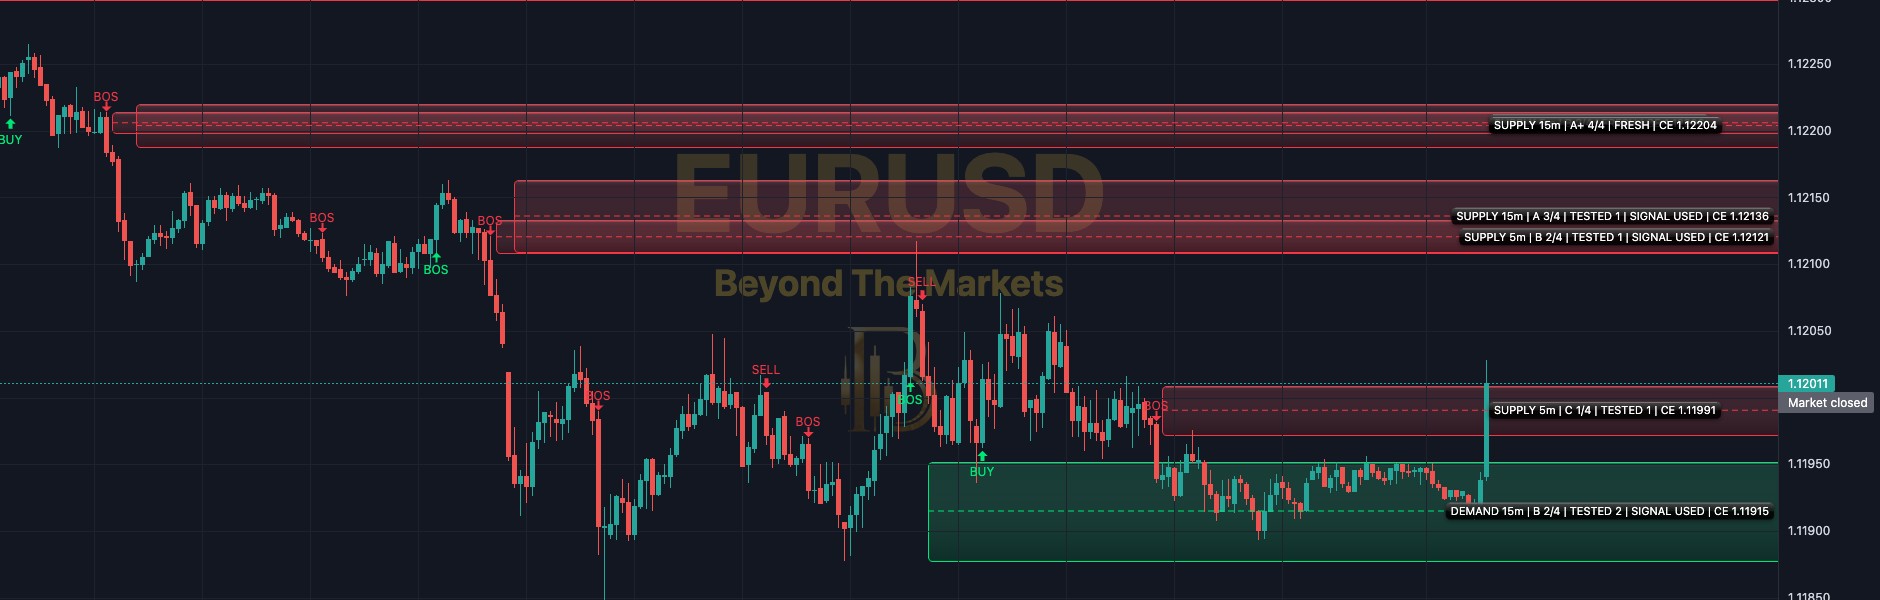 WHAT YOU SEE · EURUSD 5m
123456
1Green demand zone: the last down candle before a strong break upwards. Buyers may step in here again.
2Red supply zone: the last up candle before a strong break downwards. Sellers may step in here again.
3Dashed middle line (CE): the 50% line of the zone. CE = the zone’s halfway price.
4Zone label: type, timeframe, grade, score out of 4, and whether it is FRESH or TESTED.
5BOS arrows: a break of structure: price closed beyond a swing high (or low) with a big candle.
6BUY / SELL arrows: price came into a zone and closed strongly back out. A reaction to study.
Use it in 5 steps
- Switch it onOpen Charts → Basic Indicators → tick Variable Order Block Zones. On 5m charts it adds 15m and 1h zones too.
- Read the zone labelGrades A+, A, B, C = evidence points out of 4, not win rates. FRESH = not touched yet. TESTED 2 = visited twice.
- Trade with the structureThe dashboard says Uptrend or Downtrend from the last two breaks. Favour demand in an uptrend, supply in a downtrend.
- Wait for the reactionPrice enters a zone, then within 3 candles a strong candle closes back out: BUY or SELL. Only grade B or better, once per zone.
- Stop beyond the zonePut your stop beyond the zone’s far edge. A candle that closes through that edge removes the zone: it has failed.
Reading a reaction
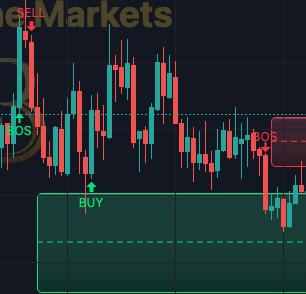
EURUSD 5m, 23 Oct. Price dipped into the green 15m demand zone and a candle closed back up: BUY. The label now says SIGNAL USED, so that zone will not signal again.
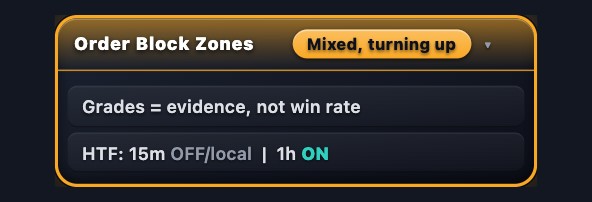
Dashboard and grades
- Trend pill: Uptrend or Downtrend when the last two breaks agree. Amber “Mixed” when they disagree.
- Evidence points (0-4): break on a close, a strong candle, a price gap (fair value gap), above-average volume.
- Grades: A+ = 4 points, A = 3, B = 2, C = 0-1. Grades = evidence, not win rate.
- HTF row: ON = 15m or 1h zones are added. OFF/local = this chart’s own zones only.
- MERGED = overlapping zones joined into one. SIGNAL USED = it has given its one BUY or SELL.
Golden rules
- A zone is an area, not an order. Wait for price to react there on a closed candle.
- Never skip the stop loss. Risk 1% of your account or less per trade.
- Skip big news times (rate decisions, NFP): price can run straight through a zone.
- Practise first with the Replay button: play old candles forward and trade them for free.
🔔 Get told when it happens: click Alerts (the bell), choose Variable Order Block Zones and tick “Confirmed BUY reaction” and “Confirmed SELL reaction”.
For educational purposes only. The results in this guide come from testing on past prices. Past performance does not guarantee future results, and real spreads, slippage and delays can make results worse. Nothing here is financial advice, and trading carries a high risk of losing money. Read the risk warning.