



AI SCANNER · BEGINNER GUIDE
BTM BOUNCE
Finds the moving average this market respects most, then marks pullback buy and sell signals with entry, stop and three targets.
◆Auto-picks the best EMA◆Sniper 1-2-3 pullback signals◆Targets 1:1, 2:1 and 3:1◆One signal per trend leg
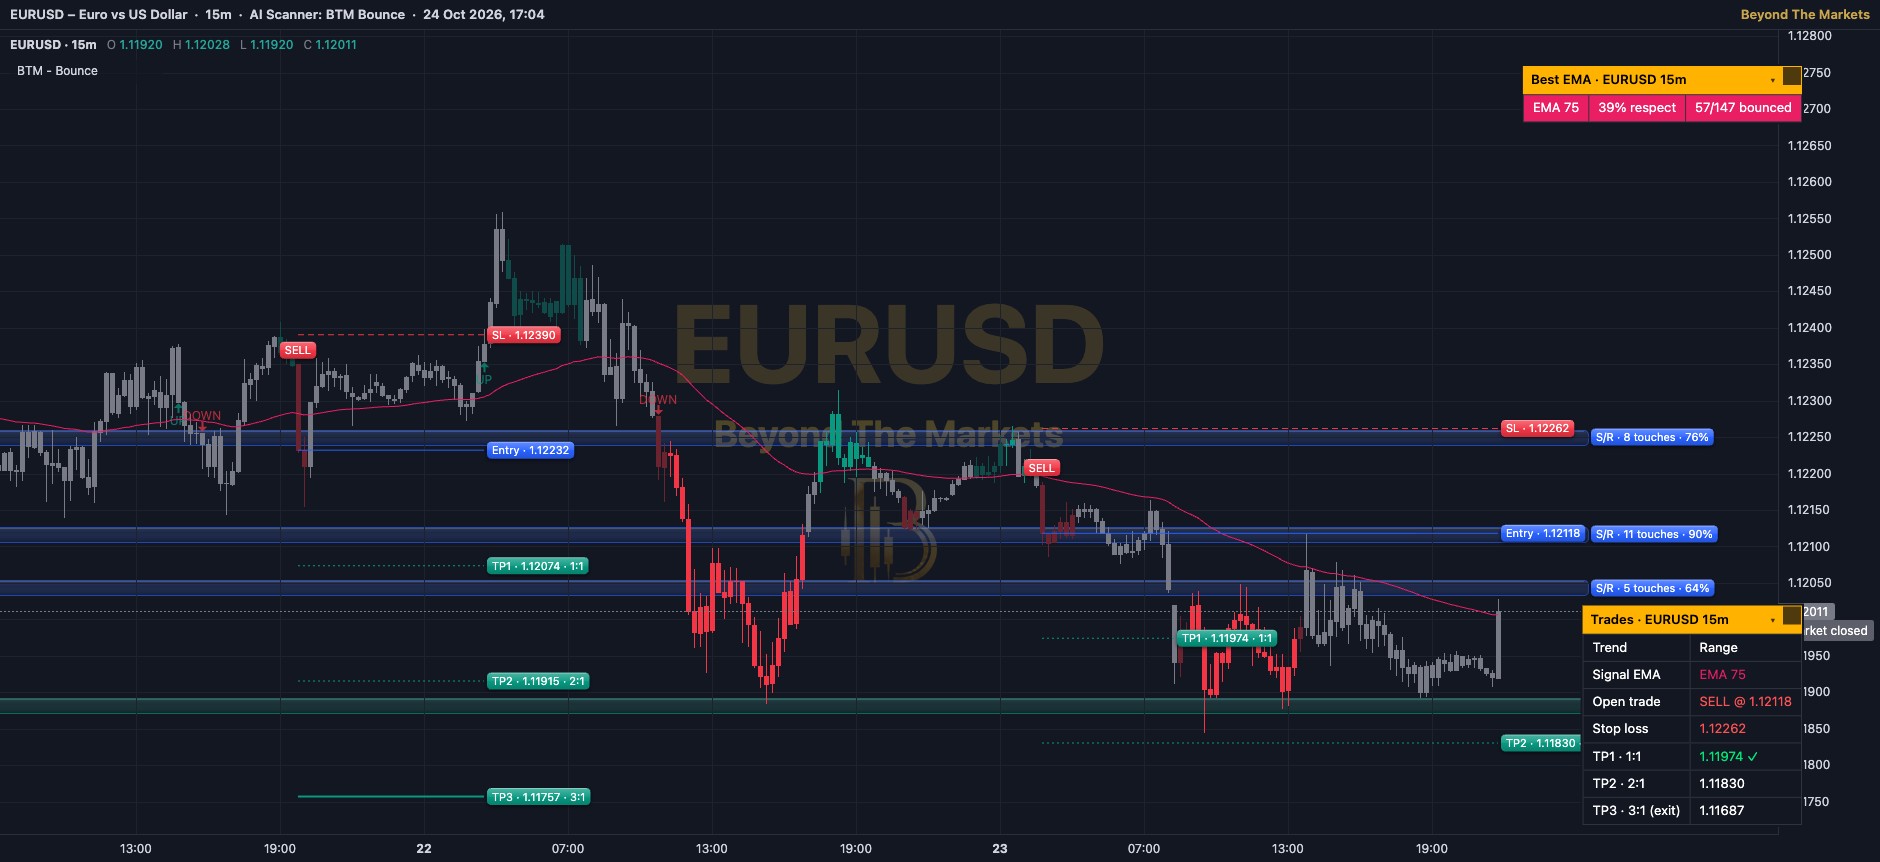 WHAT YOU SEE · EURUSD 15m
123456
1Best EMA line: the one moving average this market has bounced off most. It is picked for you.
2Support / resistance zones: green SUP = floor, red RES = ceiling, blue S/R = has been both. The % is its strength.
3Candle colours: grey = no clear trend (no signals), pale = trend starting, full green / red = strong trend.
4UP / DOWN arrows: a new trend has been confirmed (a 1-2-3 break). Signals only come after one.
5BUY / SELL label: green BUY under a candle, red SELL over it. Price pulled back to the EMA and a zone, then a strong candle closed.
6Entry, SL and TP lines: blue Entry, red dashed SL (stop loss), green TP1, TP2, TP3 (targets).
Use it in 5 steps
- Switch it onOpen Charts → AI Scanners → tick BTM – Bounce. Check the Best EMA table (top right) to see which EMA this market respects.
- Wait for a trendAn UP or DOWN arrow confirms the trend. Grey candles mean no clear trend, so no signals. Buys only come above the EMA 238.
- Wait for the pullback signalPrice dips back to the EMA and a support zone, then a strong candle closes: BUY. SELL is the mirror image, from resistance.
- Use the levels drawnEntry = get in, SL = stop loss, TP1 = 1:1, TP2 = 2:1, TP3 = 3:1 of your risk. Always set the stop.
- Follow the trade tableThe Trades table ticks each target ✓ as it is hit. By default it holds to TP3 or the stop, one trade at a time.
Reading a signal
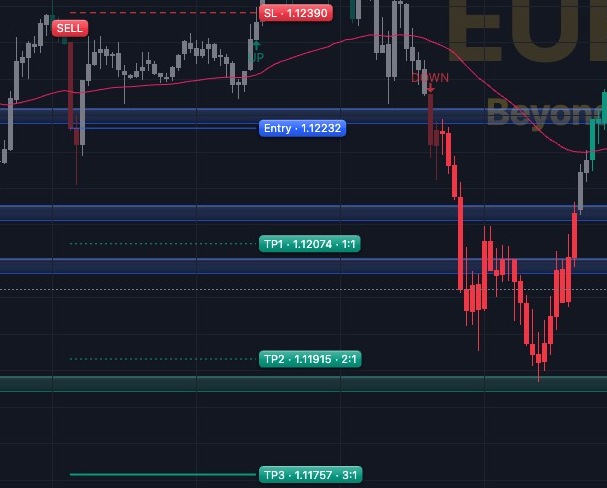
SELL signal on EURUSD 15m, 21 Oct. The label sits over the signal candle. The lines show its entry, stop loss and three targets (1:1, 2:1 and 3:1).
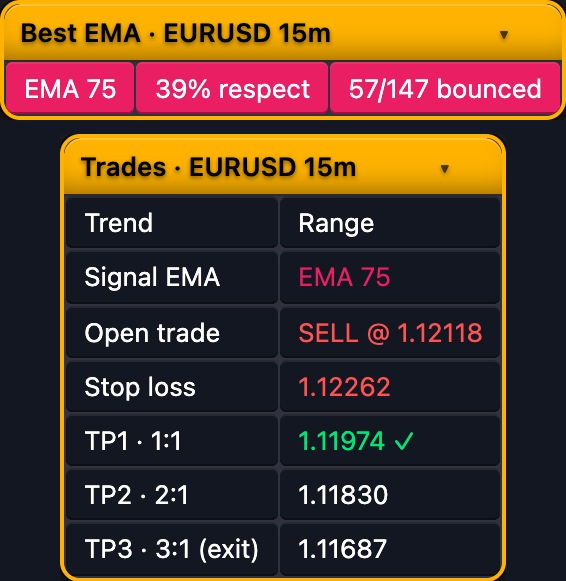
The Trades table
- Trend: Range, Starting or Strong uptrend / downtrend. It matches the candle colours.
- Signal EMA: the EMA the signals use right now, written in that line’s colour.
- Open trade: BUY or SELL @ price, or “None, waiting for a signal”. Only one trade at a time.
- TP1 · 1:1 to TP3 · 3:1 (exit): a ✓ appears as each target is hit.
- Best EMA table (top right): the chosen EMA, its respect % and tests bounced. Click a title bar to hide it.
Golden rules
- Learning? Wait for the candle to close. A BUY or SELL on the live candle can still disappear.
- Never skip the stop loss. Risk 1% of your account or less per trade.
- Check the Best EMA table. “Not enough tests yet” means it is still guessing, so take extra care.
- Practise first with the Replay button: play old candles forward and trade them for free.
🔔 Get told when it fires: click Alerts, choose BTM – Bounce and tick “Sniper Buy” and “Sniper Sell”.
For educational purposes only. The results in this guide come from testing on past prices. Past performance does not guarantee future results, and real spreads, slippage and delays can make results worse. Nothing here is financial advice, and trading carries a high risk of losing money. Read the risk warning.